Welcome to Whim Wham's Craft Blog!

I love to craft, sew, knit, crochet, needle felt...ect. Unfortunately, no one around me shares this passion. So, I am branching out into cyber world, hoping to connect with a few crazy...I mean crafty people like me. Enjoy! :)


Showing posts with label hair clips. Show all posts

Wednesday, March 9, 2011

♣ How to Make a Crocheted Clover or Shamrock ♣

crocheted shamrock clover


Saint Patricks Day is around the corner and it is time for "the wearing of the green"!  Why a Shamrock???  Well, Irish folklore showed that St. Patrick used the shamrock as a symbol to teach pre-Christian Irish people about the Holy Trinity.  My lesson isn't going to quite compare, but I will be teaching you how to make a crocheted shamrock for you to share with your friends and family!

Materials Needed:
Scissors
4 ply green yarn
size H crochet hook
pin back or clip
adhesive

Pattern:
Leaving a 4 in tail, Chain 3.  Double crochet in the chain 1 space 3 times. Chain 2 and slip stitch in the same chain 1 hole that the double crochets were made in (all stitches will be made in this same hole for the remaining petals) Petal one is complete. Now, *chain 2 and double crochet 3 times followed by chain 2 and a slip stitch.  Repeat from * one more time. You should now have all 3 petals completed.  To make the stem, chain 5 from your last slip stitch.  Single crochet in the 2nd chain from the hook, single crochet in the next chain, slip stitch into the next, and slip stitch into the last one as well.  Bring your tail end through your last stitch and pull tight.  Cut your yarn and tie both tail ends together on the back.

If you want to make these bigger or smaller, just adjust the yarn and hook size accordingly.  Now that you have your shamrock completed, either glue it to a hair clip or pin back and wear it proudly.  These are so quick and easy to make.  Whip up a batch and hand them out, so no one is without green on St. Patty's Day!

As always, feel free to ask any questions or leave comments.

Tuesday, May 25, 2010

When it Rains it Pours!

"When it rains it pours!" my grandma would always say to me when things weren't going her way.  However, sometimes when it rains and pours, it can be the very cause of nothing going your way!
First I want to apologize for the lack of posts lately and offer an explanation for my absence.  My father owns a historical building that did not weather the recent storms.  A severe wind storm peeled back pieces of the roofing and left a historically huge disaster behind.  We were not aware of the damage until after it rained for days, filling the building up like a bucket.  When I first discovered what had happened, I wanted to cry.  Pieces from the 18 ft ceiling had fallen down, and the beautiful hard wood maple floors buckled up about 1 ft off the ground.  The whole building was basically ruined!
My father is out of town on business.  So for the last 2 weeks, I have been dealing with this disaster and a renovation team that is trying to determine if the building is even going to be salvageable.  It has been heart breaking to watch them tear everything out of there and toss it into dumpsters....100 year old doors, the entire original maple floor, all of the contents that we had in there.  The news just keeps getting worse and it looks like our historical building will soon be history.  I can't even image them knocking it down.  It is the 2nd oldest building in our town, and it has been there forever.  I have spent so much of my life in that building. I grew up dancing in there (yes I used to be a dancer haha!). I opened my first business up with my best friend there too.  Lots of good memories!

wool felt hair clip covers
Anyway, sorry for rambling on.
I have still managed to get some crafting done in between the chaos.  I cut out about 350 wool felt covers for the needle felted hair clips I make on Etsy.  (It was actually kind of therapeutic.  Crafting often can be good therapy!)  I also did some needle felting...nothing helps you distress like stabbing something with a needle a couple thousand times!


handmade baby gift set
I had a baby shower to go to for my cousin this weekend too, so I made her baby girl a matching gift set.  I appliquéd and sewed a onesie dress, two burp clothes, a pacifier clip, and a reversible bonnet.  I made everything the morning of the baby shower and still managed to arrive looking like I've slept and showered recently! =)


So, that's what's been going on with me for the last couple of weeks.  Hopefully, I will have so more free time soon, to put a decent tutorial on here, and catch up on my 870 items I haven't read yet in Google reader!  Wish me luck!

Friday, April 23, 2010

How to Make a Snail Ribbon Hair Clip

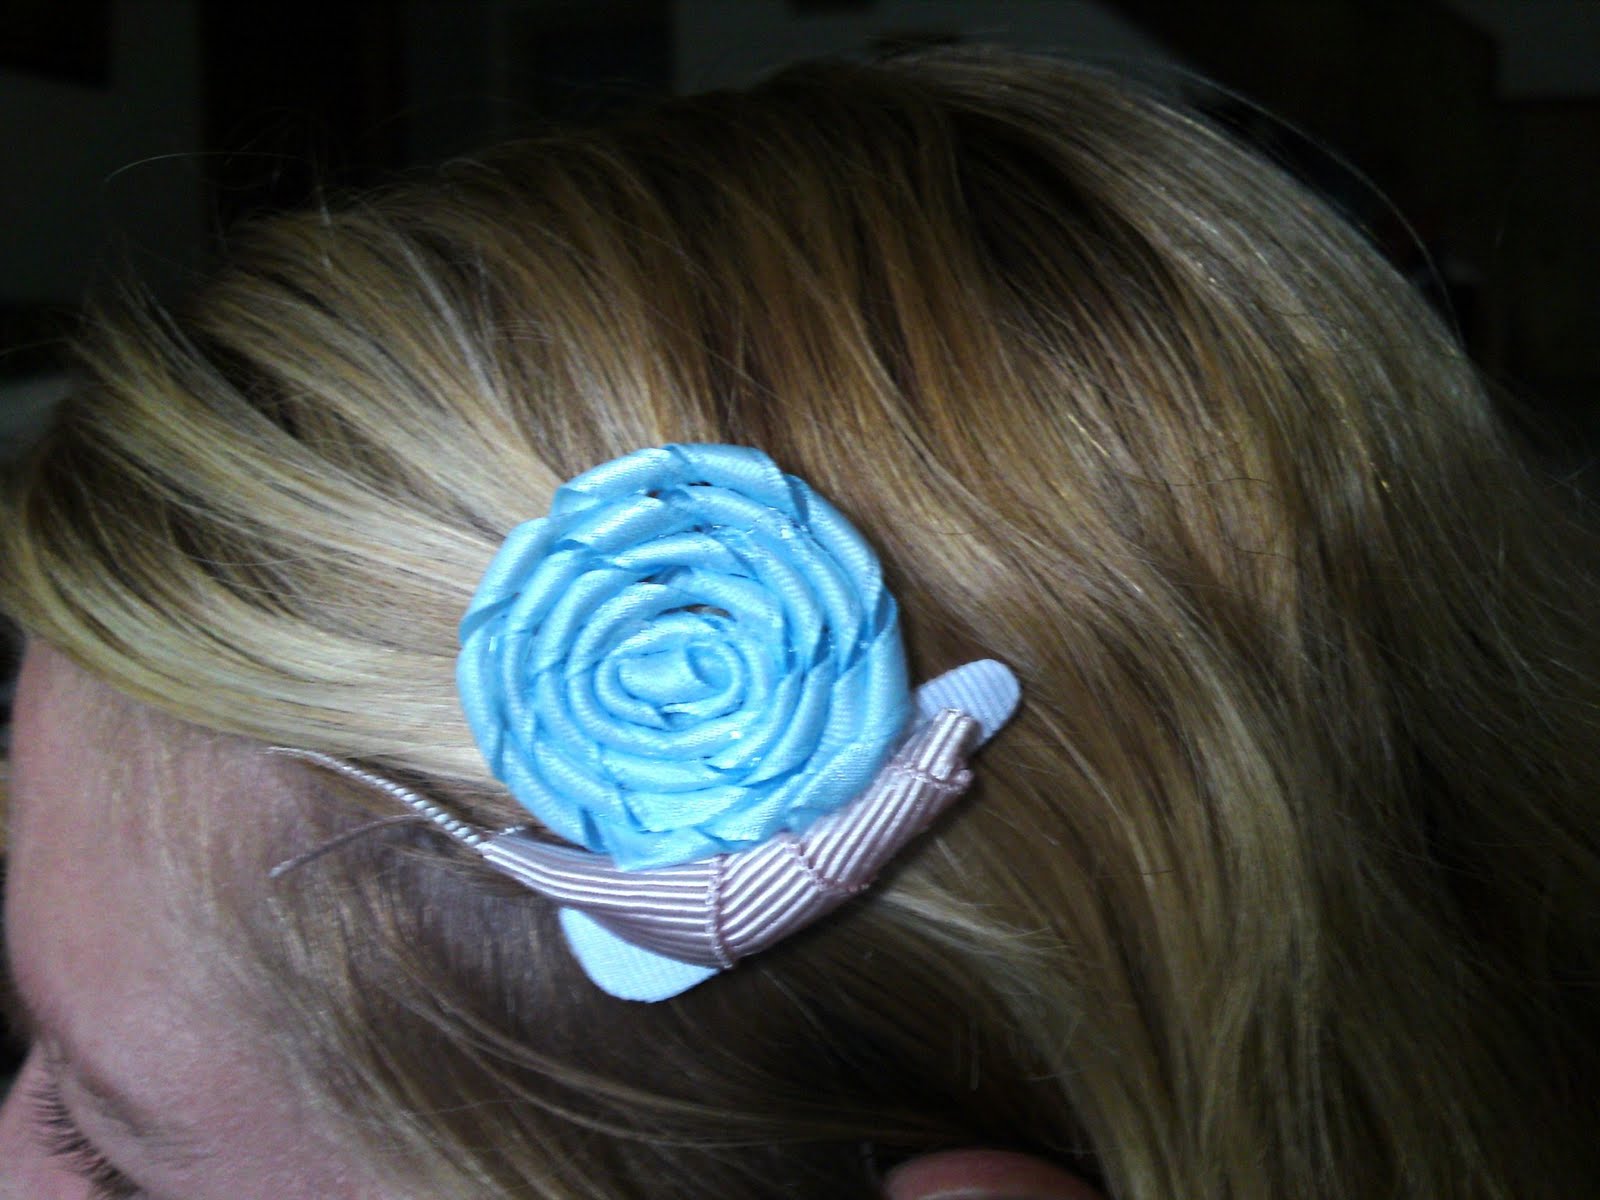
ribbon snail hair clip

I saw a little girl wearing one of these in her hair, and thought..."I have to make that!".  I don't work with ribbon very much, but being a crafter, I had plenty of it laying around.  I don't know if I made this right, but I think it turned out well enough to pass on to the crafty community! =)

Here is what you will need to get started-
  • 4 pieces of ribbon. 3 1/2" for the body, 2 1/2" to cover the clip, 1 3/4" for the antenna, and 21" for the shell
  • wooden skewer or dowel rod and clips to make curly korker ribbon
  • hot glue gun
  • scissors
  • lighter (not shown). This is used to seal the ends of the ribbon to prevent fraying
  • snap hair clip


First seal all ends of the ribbons by placing them near the flame of the lighter.  Test this on a scrap piece first to get the hang of it (warning- do not do this with cotton ribbon. It will catch on fire. Only polyester- the silky kind).  The end of the ribbon will melt a little, giving it a nice sealed edge.  Next, we are going to make the korker ribbon for the shell.  Clip one end of the 21" ribbon to the end of the skewer and wrap in around in a spiral, securing it with another clip (as in the photo to the left).  Once your skewer or dowel is wrapped, place it on a cookie sheet or tin foil in a 275 degree oven for 20 minutes. 


While the korker ribbon bakes, we will make the rest of the clip.   The clip I saw the little girl wearing was an alligator clip.  I however didn't have one, so I had to improvise and use a snap clip.  I wanted to cover the front of the clip with ribbon for 2 reasons.  I thought it would look nicer, and I also needed a surface to glue the snail on to.  This is a little finicky, but it serves its purpose well.  I took plenty of pictures to better help explain my poor writing skills! =)
The first thing you want to do is unsnap the clip.  Place a thin bead of glue all around the top part of the clip, just do not put any on the middle part that snaps open.  Quickly put your 2 1/2" piece of ribbon on top of the glue before it sets, and smooth it out as you close the clip.  Open and close the clip after it cools to make sure the center didn't get glued shut.  Next, cut around the clip leaving a tiny bit of overhang.  Being careful not to burn yourself, pass the cut edges near the flame of the lighter (I find it easier to use a candle lighter).  You will see the edge of the ribbon shrink in a bit as it seals.  Do this around the entire clip.  We now have a blank clip all ready for a new snail to live on!


Let's make the snail body.  Take the 3 1/2" piece of ribbon and wind it around like in the picture below, making the tail narrower than the head.  Once you have it the way you like it, place a couple dabs of glue to hold it in place.  Make a slight bend in the body for the snail head, and glue it onto the clip.


What's a snail without antennas?  To make the antennas cut the edges off of the 1 3/4" ribbon and place them on a cookie sheet or aluminum foil.  We are going to run the lighter over them several times, allowing them to melt and shrink.  This will give them some more stability and keep them from becoming a frayed disaster.  Once your antennas are to your liking, place a dab of glue in the snails head.  Put both antennas into the glue and squeeze the head closed.

By this time, your korker ribbon should be done, or close to it.  Once it is done, remove it from the skewer.  The snail shell is made by winding the korker ribbon around in circles like a lollipop.  Start by rolling one end in and gluing it as you go.  Make sure to keep the curl in the ribbon tight.  Run a bead of glue along the edge of the circle you are forming, securing each ring to the next.  When you are done it should look like a ribbon lollipop (a great idea for another clip, right?!).  Place some glue along the snails back and on the clip above it, and glue the shell into place.  You now have a cool snail hair clip that any kid is sure to love!

The clips lay nicely against the head.  My sister was kind enough to model  for a photo.  I made 2 snail clips today.  One for my niece and one for my spoiled daughter of course.  They loved them!


Have fun making your own snail clips and be sure to post your pictures of them at the WhimWham Flickr Group!  Questions and comments are welcome as always! =)

Related Posts with Thumbnails
 
Blogging tips