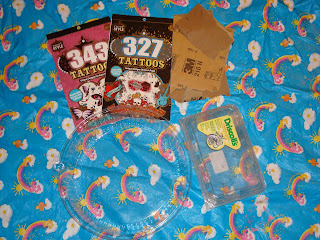
The jewelry is made from shrink plastic. I used recycled plastic containers to make mine. Plastic that has a recycle #6 on it, usually strawberry containers or take out lids, works like shrinky dink material. So save up those containers for some shrinking fun!
Anyway, here is what you will need for this project.
Shrink plastic or recycle #6 plastic
Sandpaper
Temp Tattoos and a damp towel
Hole Punch
Oven and a cookie sheet
Acrylic Sealant
Jewelry Findings
Let's get started!
If you are using recycled containers, cut out a nice flat area that contains no writing or label. Rough up one side of the plastic with some fine sandpaper. Next, cut out the temp tattoos that you like (remember that these will shrink considerably). Arrange them on the plastic to make sure they all fit. Once you have them arranged the way you want, peel off the protective backing and apply the tattoos to the rough side of the plastic (just as you would on your skin with a wet towel).
When the plastic shrinks it will be very difficult to cut, so now is the time to cut the jewelry into the shape you want it to be. Be sure to leave enough room to put a hole for a jump ring or cord. The holes shrink too, so I use a hole punch and eyelet maker to put some decent sized holes into mine. (The penny is there for size reference.)
It's all cut out, and the holes are punched! Time for the shrinking magic!
Place the pieces tattoo side up on a cookie sheet or aluminum foil, and put them in an oven at around 250-275 degrees. If the oven was preheated, the plastic will probably shrink right away. Larger pieces tend to curl up, but usually lay flat again as they shrink. Once the pieces have shrunk, remove them from the oven and allow them to cool for a few minutes. Look at the size difference! The other cool thing is the tattoos shrink right along with it. Neat, right!?
Just spray them with an acrylic sealer for added protection, and add the jewelry findings of your choice. Enjoy your trash to treasure!


I love this idea! My daughter would love to make them too...what are some examples of recycled plastic #6
ReplyDeleteI have seen recycle #6 plastic used for strawberry containers, take out lids, cookie/bread containers from the bakery dept. I have also seen those clear plastic cups...they melt into a different shape that can make some pretty neat bracelets.
ReplyDeleteJust flip over any clear plastic container and hopefully you'll find some free shrinky dink material! Good luck and have fun! :)